How to Deploy Drone 2.16.0 in Docker Swarm Behind Caddy v2.6.4
Drone is a self-service, container-native Continuous Integration and Delivery platform designed for busy development teams.
Drone is a self-service Continuous Integration (CI) and Continuous Delivery (CD) platform built for busy development teams.
In this post, I will show you how to deploy Drone 2.16.0, a container-native CI/CD platform, into a Docker Swarm cluster using Docker Compose, sitting securely behind a Caddy v2.6.4 reverse proxy.
If you want to learn more about Drone, check out the resources below:
Let’s dive into the deployment.
Prerequisites
Ensure you have the following requirements in place before proceeding:
- A Docker Swarm Cluster configured with GlusterFS for persistent storage.
- Caddy deployed as the ingress reverse proxy to expose microservices externally.
Introduction to Drone
Drone is a continuous delivery system built entirely on container technology. It uses a simple YAML build file to define and execute pipelines inside isolated Docker containers.
The build file (.drone.yml) can contain a single pipeline or multiple pipelines designed to build, test, and publish your applications to a container registry of your choice.
Pipelines are configured using this simple, highly readable YAML file committed directly to your Git repository. Each step in the pipeline executes inside an isolated Docker container that Drone automatically downloads at runtime.
Drone Features
Drone offers a highly flexible feature set:
- Any Source Code Manager: Seamlessly integrates with GitHub, GitLab, Bitbucket, and Gitea.
- Any Platform: Supports multiple operating systems and architectures, including Linux x64, ARM, ARM64, and Windows x64.
- Any Language: Works flawlessly with any programming language, database, or service.
- Container Native: If it can run inside a Docker container, Drone can run it in a pipeline.
Persisting Drone Data with GlusterFS
Containers deploy quickly and use system resources efficiently, giving developers application portability and operations teams standard deployment units.
However, a common misconception is that containers are strictly ephemeral—meaning if a container restarts, all data is lost. While this is true by default, we can absolutely containerize stateful applications by mapping persistent storage volumes.
To overcome ephemeral data loss, I use GlusterFS.
I previously set up a replicated GlusterFS volume to ensure data is replicated across all nodes in the cluster.
Here is how the replicated volume works:
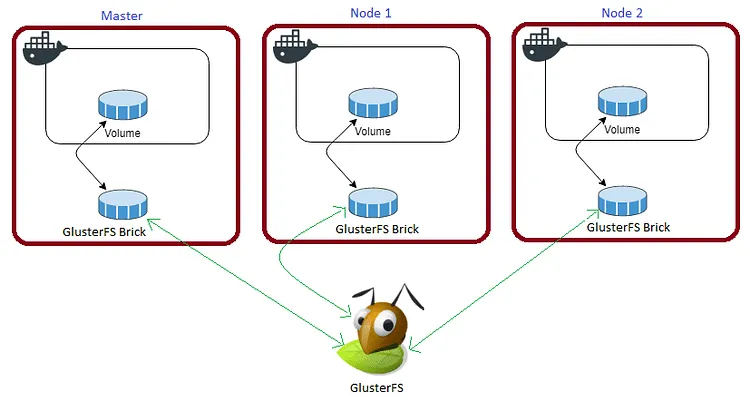
The volume is mounted across all nodes. When data is written to the
/mntpartition, it is instantly replicated to the other nodes in the cluster.
If any node fails, the application automatically restarts on another node without losing data. This is the primary advantage of a replicated volume.
The Drone service must remain available even if a node in our Docker Swarm cluster goes offline. By mapping our container volumes to the GlusterFS mount, our SQLite database and server configurations survive restarts and outages.
Create a folder named dronedata in the /mnt directory to map the container’s /data volume:
cd /mnt
sudo mkdir -p dronedata
Watch the video below for a complete guide on setting up a GlusterFS Replicated Volume.
Prepare the Drone Environment
We will use Docker Compose to define the environment and deploy the stack.
I keep all application configurations in the /opt directory on the Swarm manager node. We will also attach Drone to the caddy overlay network created in a previous tutorial.
Navigate to /opt and create the configuration directory:
cd /opt
sudo mkdir -p drone
cd drone
sudo touch drone.yml
Drone Docker Compose Configuration
Open drone.yml in your editor:
sudo nano drone.ymlPaste the following Docker Compose configuration. I am using SQLite as the backend database for simplicity and portability.
version: "3.7"

services:
  drone:
    image: drone/drone:latest
    volumes:
      - /mnt/dronedata:/data
    environment:
      - DRONE_DATABASE_DRIVER=sqlite3
      - DRONE_DATABASE_DATASOURCE=/data/database.sqlite
      - DRONE_RPC_SECRET=drone-client-secret
      - DRONE_COOKIE_TIMEOUT=720h
      - DRONE_CRON_DISABLED=true
      - DRONE_OPEN=true
      - DRONE_NETWORK=caddy
      - DRONE_ADMIN=rajasekhar
      - DRONE_USER_CREATE=username:rajasekhar,admin:true
      - DRONE_SERVER_PORT=:80
      - DRONE_GIT_ALWAYS_AUTH=true
      - DRONE_SERVER_HOST=drone.example.com
      - DRONE_HOST=[https://drone.example.com](https://drone.example.com)
      - DRONE_SERVER_PROTO=https
      - DRONE_TLS_AUTOCERT=false
      - DRONE_AGENTS_ENABLED=true
      - DRONE_GITEA_SERVER=[https://gitea.example.com](https://gitea.example.com)
      - DRONE_GITEA_CLIENT_ID=gitea-client-id
      - DRONE_GITEA_CLIENT_SECRET=gitea-client-secret
    networks:
      - caddy
    ports:
      - "8005:80"
    deploy:
      placement:
        constraints: [node.role == worker]
      replicas: 1
      update_config:
        parallelism: 2
        delay: 10s
      restart_policy:
        condition: on-failure

  runner:
    image: drone/drone-runner-docker:latest
    command: agent
    depends_on:
      - drone
    volumes:
      - /var/run/docker.sock:/var/run/docker.sock
    environment:
      - DRONE_RPC_SERVER=[https://drone.example.com](https://drone.example.com)
      - DRONE_RPC_HOST=drone.example.com
      - DRONE_RPC_PROTO=https
      - DRONE_RPC_SECRET=drone-client-secret
      - DRONE_RUNNER_CAPACITY=10
      - DRONE_RUNNER_NETWORKS=caddy
      - DRONE_RUNNER_NETWORK_OPTS=com.docker.network.drive.mtu:1442
    networks:
      - caddy
    deploy:
      placement:
        constraints: [node.role == worker]
      replicas: 1
      update_config:
        parallelism: 2
        delay: 10s
      restart_policy:
        condition: on-failure

volumes:
  dronedata:
    driver: "local"

networks:
  caddy:
    external: true
    attachable: true
The environment variables above configure Drone to authenticate against a Gitea instance. If you are using GitHub, GitLab, or Bitbucket, update the Oauth credentials accordingly. Review the Drone Provider Documentation for exact parameter names.
Caddyfile Configuration
The Caddyfile is a highly readable configuration format for the Caddy web server.
Caddyfile is easy to write, easy to understand, and expressive enough for almost all use cases.
Here is the production-ready Caddyfile required to expose Drone securely. Learn more about writing Caddyfiles here.
{
    email you@example.com
    cert_issuer acme
    acme_ca [https://acme-v02.api.letsencrypt.org/directory](https://acme-v02.api.letsencrypt.org/directory)

    servers {
        protocol {
            experimental_http3
            allow_h2c
            strict_sni_host
        }
        timeouts {
            read_body   10s
            read_header 10s
            write       10s
            idle        2m
        }
        max_header_size 16384
    }
}

drone.example.com {
    log {
        output file /var/log/caddy/drone.log {
            roll_size 20mb
            roll_keep 2
            roll_keep_for 6h
        }
        format console
        level error
    }
    encode gzip zstd
    reverse_proxy drone:80
}
If you want more insight into deploying Caddy in a Docker Swarm cluster, check out my previous post on Caddy.
Full Stack Deployment (Combined)
If you prefer to deploy Caddy and Drone together in a single stack, here is the combined docker-compose.yml file. You can deploy as many subsequent sites as you want by adding them to this proxy network.
Remember to map your site data directories (like
/mnt/dronedata:/data) exactly as specified.
version: "3.7"

services:
  caddy:
    image: tuneitme/caddy
    ports:
      - "80:80"
      - "443:443"
    networks:
      - caddy
    volumes:
      - ./Caddyfile:/etc/caddy/Caddyfile
      - /mnt/caddydata:/data
      - /mnt/caddyconfig:/config
      - /mnt/caddylogs:/var/log/caddy
      - /mnt/gitea:/data
    deploy:
      placement:
        constraints:
          - node.role == manager
      replicas: 1
      update_config:
        parallelism: 2
        delay: 10s
      restart_policy:
        condition: on-failure

  drone:
    image: drone/drone:latest
    volumes:
      - /mnt/dronedata:/data
    environment:
      - DRONE_DATABASE_DRIVER=sqlite3
      - DRONE_DATABASE_DATASOURCE=/data/database.sqlite
      - DRONE_RPC_SECRET=drone-client-secret
      - DRONE_COOKIE_TIMEOUT=720h
      - DRONE_CRON_DISABLED=true
      - DRONE_OPEN=true
      - DRONE_NETWORK=caddy
      - DRONE_ADMIN=rajasekhar
      - DRONE_USER_CREATE=username:rajasekhar,admin:true
      - DRONE_SERVER_PORT=:80
      - DRONE_GIT_ALWAYS_AUTH=true
      - DRONE_SERVER_HOST=drone.example.com
      - DRONE_HOST=[https://drone.example.com](https://drone.example.com)
      - DRONE_SERVER_PROTO=https
      - DRONE_TLS_AUTOCERT=false
      - DRONE_AGENTS_ENABLED=true
      - DRONE_GITEA_SERVER=[https://gitea.example.com](https://gitea.example.com)
      - DRONE_GITEA_CLIENT_ID=gitea-client-id
      - DRONE_GITEA_CLIENT_SECRET=gitea-client-secret
    networks:
      - caddy
    ports:
      - "8005:80"
    deploy:
      placement:
        constraints: [node.role == worker]
      replicas: 1
      update_config:
        parallelism: 2
        delay: 10s
      restart_policy:
        condition: on-failure

  runner:
    image: drone/drone-runner-docker:latest
    command: agent
    depends_on:
      - drone
    volumes:
      - /var/run/docker.sock:/var/run/docker.sock
    environment:
      - DRONE_RPC_SERVER=[https://drone.example.com](https://drone.example.com)
      - DRONE_RPC_HOST=drone.example.com
      - DRONE_RPC_PROTO=https
      - DRONE_RPC_SECRET=drone-client-secret
      - DRONE_RUNNER_CAPACITY=10
      - DRONE_RUNNER_NETWORKS=caddy
      - DRONE_RUNNER_NETWORK_OPTS=com.docker.network.drive.mtu:1442
    networks:
      - caddy
    deploy:
      placement:
        constraints: [node.role == worker]
      replicas: 1
      update_config:
        parallelism: 2
        delay: 10s
      restart_policy:
        condition: on-failure

volumes:
  dronedata:
    driver: "local"

networks:
  caddy:
    external: true
    attachable: true
I used a custom Caddy Docker image bundled with specific plugins (like Cloudflare DNS and Caddy Auth Portal) for my environment:
Deploy the Stack
Deploy the stack to your Swarm using the following command:
docker stack deploy --compose-file drone.yml droneIn Docker Swarm, whatever you deploy via compose is called a “stack,” and it contains multiple “services.”
Check the status of the deployment:
docker stack ps droneInspect the logs to ensure successful startup:
docker service logs drone_droneYou will notice that Caddy automatically intercepts the traffic and redirects it to HTTPS, negotiating a Let’s Encrypt certificate on the fly.
Access and Configure Drone
Open your browser and navigate to drone.example.com. It will automatically redirect securely to https://drone.example.com/welcome (ensure you replace example.com with your actual domain).
Ensure you have configured a DNS A-Record or CNAME pointing drone.example.com to your Swarm ingress load balancer.
Reference Images from the Deployment:

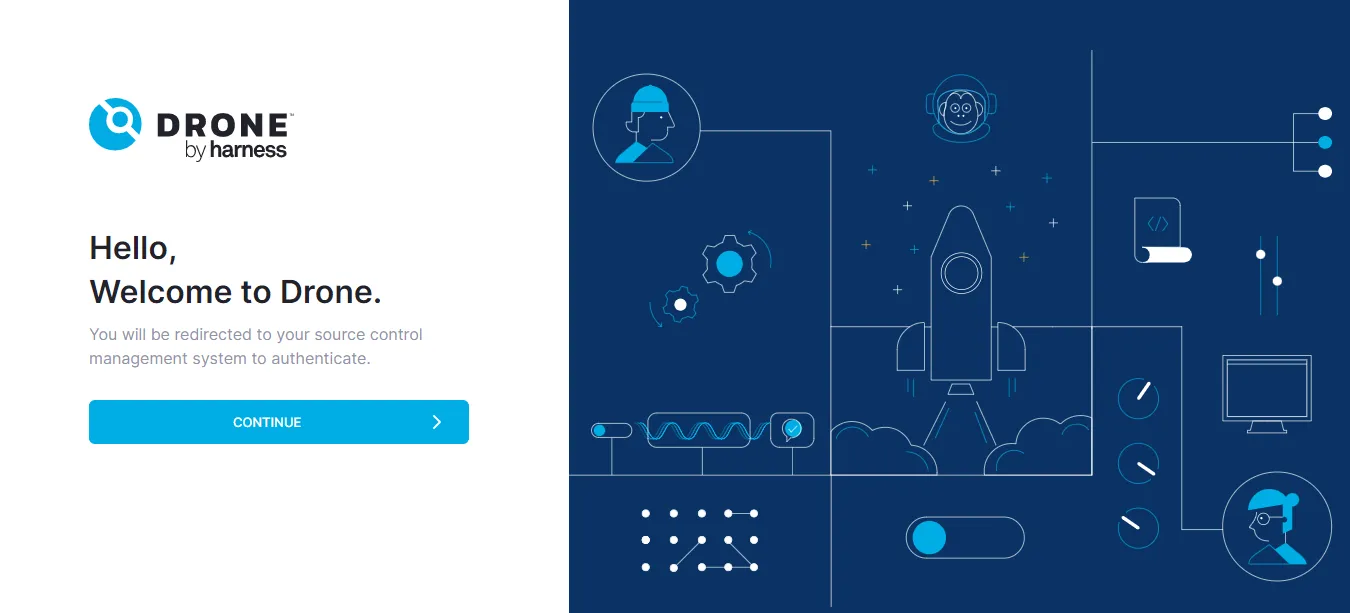
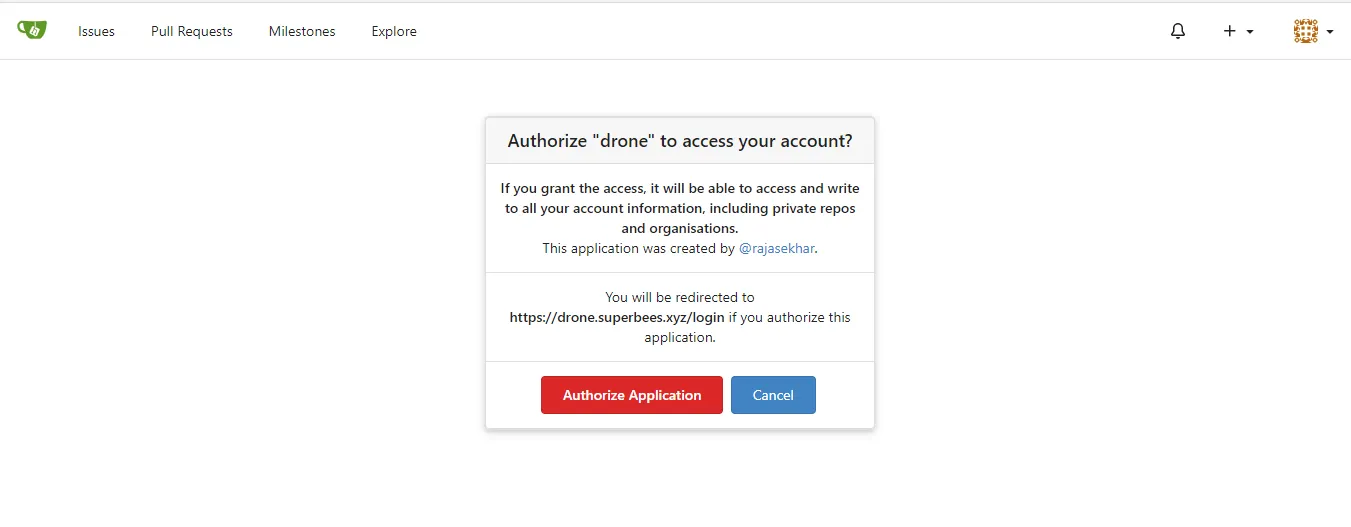
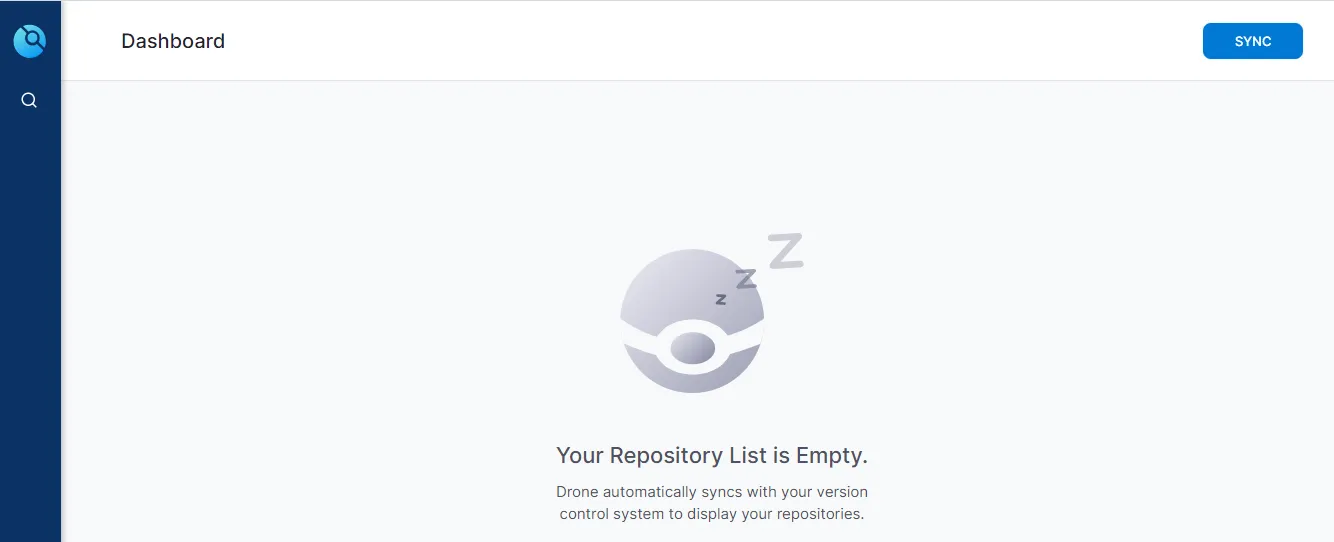
The deployment of Drone behind Caddy in our Docker Swarm cluster is complete!
If you enjoyed this tutorial, please share your thoughts in the comments below. It helps me bring more self-hosted open-source content to the community.
Stay tuned for more deployment guides!

Continue reading

How to Deploy Woodpecker CI 1.0.3 in Docker Swarm Behind Caddy v2.7.5
Woodpecker is a simple, highly extensible CI engine. It focuses on executing pipelines inside containers. If you use containers in your daily workflow, you'll love Woodpecker.

How to Deploy Gitea 1.18.0 in Docker Swarm Behind Caddy v2.6.2
Git with a cup of tea. Learn how to deploy Gitea, a painless, self-hosted, lightweight code hosting solution written in Go, to a Docker Swarm cluster.

How to Deploy Jenkins v2.426.2 in Docker Swarm Behind Caddy v2.7.6
Jenkins is a popular open-source automation server written in Java. Learn how to deploy a highly available CI/CD pipeline engine using Docker Swarm and Caddy.