How to Deploy BookStack 0.29.3 in Docker Swarm Behind Traefik v2.0
BookStack is a simple, self-hosted platform for organizing and storing information, allowing you to structure documentation into books, chapters, and pages.

BookStack is a simple, self-hosted platform for organizing and storing information where content is intuitively categorized into books, chapters, and pages.
This post will guide you through deploying BookStack 0.29.3 to a Docker Swarm Cluster using the Docker Compose tool.
BookStack is a simple, self-hosted, easy-to-use platform for organizing and storing information.
You can learn more by visiting the official BookStack website and their GitHub repository.
Let’s start with the actual deployment.
Prerequisites
Please ensure you fulfill the following requirements before proceeding with the deployment:
- A Docker Swarm Cluster with GlusterFS configured as your persistent storage.
- Traefik acting as a reverse proxy to expose your micro-services to the external web.
- A Database stack deployed to host application databases.
Introduction to BookStack
If you are looking to self-host your product documents to reduce ticket management overhead, manage project documentation for internal teams, or maintain a private repository, BookStack is an excellent solution.
BookStack is an opinionated wiki system that provides a pleasant and simple out-of-the-box experience.
Why Choose BookStack?
BookStack is designed to be accessible. New users only require basic word-processing skills to start creating content.
BookStack is not designed as an extensible platform to be used for purposes that differ from the statement above.
In regards to development philosophy, BookStack maintains a relaxed, open, and positive approach. It is free software developed and maintained by individuals donating their free time.
The core principle of storing information within BookStack is based on the concept of a normal stack of books. Just like physical books, BookStack books can contain chapters and pages. You start by creating a “Book” that acts as the highest level of categorization. Ideally, you would have separate books for separate topics.
Within a book, you can directly create pages, or you can first create chapters. Chapters provide an additional level of grouping to keep pages organized, though they are entirely optional.
Once your library grows, you can use “Bookshelves” to organize your Books. Bookshelves can contain multiple books, and a single book can be placed on multiple Bookshelves.
Core Features
BookStack provides advanced power features for those who desire them, but they never interfere with the core, simple user experience. Here are some of the standout features:
- Free and Open Source: BookStack is MIT licensed. There is no cost to download and install your own instance.
- Simplicity: It features a clean WYSIWYG interface where content is broken into Books, Chapters, and Pages.
- Powerful Search: The content is fully searchable at the book level or across all books, chapters, and pages. You can link directly to any paragraph to keep documentation tightly connected.
- Lightweight Architecture: Built using PHP on top of the Laravel framework and MySQL, it can run comfortably on a $5 DigitalOcean VPS.
- Highly Customizable: You can configure BookStack to suit your use case by changing the name, logo, and registration options, as well as toggling public visibility.
- Authentication Integrations: Along with default email/password login, it supports social providers such as GitHub, Google, Slack, and AzureAD. Okta and LDAP options are also available for enterprise environments.
- Additional Perks: Multi-lingual support, an optional Markdown editor, and a robust roles/permissions system.
Persist BookStack Data
Containers are fast to deploy and make efficient use of system resources. However, there is a common misperception that containers are strictly ephemeral—meaning if we restart a container, all data is lost. While this is true by default, it is absolutely possible to containerize stateful applications.
I am using GlusterFS to overcome the ephemeral nature of containers.
I previously set up a replicated GlusterFS volume to ensure data is replicated throughout the cluster. The diagram below explains how the replicated volume works:
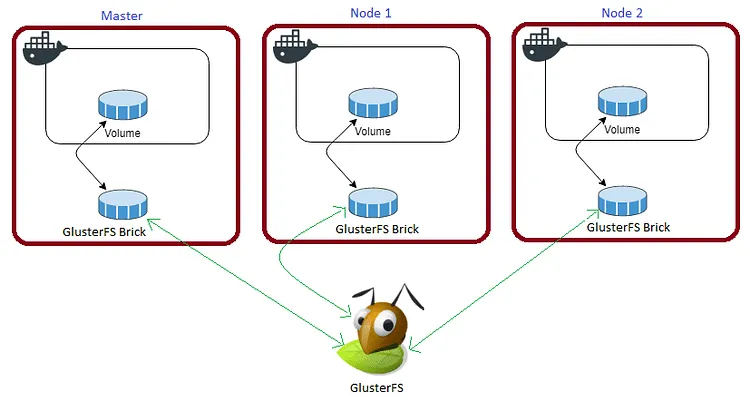
The volume is mounted on all nodes. When a file is written to the
/mntpartition, the data is instantly replicated to all other nodes in the cluster.
If one of the nodes fails, the application automatically restarts on another node without losing any data. This is the beauty of a replicated volume.
Persistent application state or data needs to survive application restarts and host outages. By storing data in GlusterFS and performing periodic backups, we can confidently spin up a new application container anywhere else in case of unexpected infrastructure issues.
For BookStack, we need to persist the /var/www/bookstack/public/uploads and /var/www/bookstack/storage/uploads directories.
Create the necessary persistent folders in your /mnt directory:
cd /mnt
sudo mkdir -p buploads
sudo mkdir -p bsuploads
Please watch the below video for a visual walkthrough of the GlusterFS Replicated Volume Setup.
Prepare the BookStack Environment
Create a dedicated folder in the /opt directory to place your Docker Compose .yml configuration file.
cd /opt
sudo mkdir -p bookstack
cd bookstack
sudo touch bookstack.yml
BookStack Docker Compose Configuration
Open the bookstack.yml file using the nano editor:
sudo nano bookstack.ymlCopy and paste the following code into bookstack.yml. This represents the full Docker Swarm stack configuration for BookStack.
version: "3.7"

services:
  bookstack:
    image: solidnerd/bookstack
    ports:
      - '8081:8080'
    volumes:
      - /mnt/buploads:/var/www/bookstack/public/uploads
      - /mnt/bsuploads:/var/www/bookstack/storage/uploads
    secrets:
      - mysql_root_password
    environment:
      - DB_HOST=db:3306
      - DB_DATABASE=bookstack
      - DB_USERNAME=root
      - DB_PASSWORD_FILE=/run/secrets/mysql_root_password
      - APP_URL=[https://bookstack.example.com](https://bookstack.example.com)
      - STORAGE_TYPE=local_secure
      - AUTH_METHOD=standard
      - APP_AUTO_LANG_PUBLIC=true
      - APP_VIEWS_BOOKS=grid
      - CACHE_DRIVER=file
      - SESSION_DRIVER=file
      - SESSION_LIFETIME=120
      - SESSION_COOKIE_NAME=book_session
      - SESSION_SECURE_COOKIE=false
      - CACHE_PREFIX=bookstack
    networks:
      - proxy
    deploy:
      placement:
        constraints: [node.role == worker]
      replicas: 1
      update_config:
        parallelism: 2
        delay: 10s
      restart_policy:
        condition: on-failure
      labels:
        - "traefik.enable=true"
        - "traefik.docker.network=proxy"
        - "traefik.http.routers.bookstack.rule=Host(`bookstack.example.com`)"
        - "traefik.http.routers.bookstack.tls=true"
        - "traefik.http.routers.bookstack.tls.certresolver=default"
        - "traefik.http.routers.bookstack.entrypoints=websecure"
        - "traefik.http.services.bookstack.loadbalancer.server.port=8080"

secrets:
  mysql_root_password:
    external: true

volumes:
  buploads:
    driver: "local"
  bsuploads:
    driver: "local"

networks:
  proxy:
    external: true
As mentioned in the prerequisites, I am using a MariaDB database that was previously deployed to our Docker Swarm environment.
There are many configuration options available via environment variables. Please check the official documentation for the full list of parameters.
If you prefer community-maintained Docker setups, check out these alternatives:
LinuxServer.io
Solidnerd
Deploy BookStack using Docker Compose
Please ensure that you have created the bookstack database within your MariaDB instance before deploying this stack.
Now, deploy the stack to your Swarm using the following command:
docker stack deploy --compose-file bookstack.yml bookstackYou can name the stack anything you prefer; I have simply named it
bookstack.
Check the status of the stack deployment:
docker stack ps bookstackOnce the container is running, open any browser and navigate to https://bookstack.example.com (or whichever URL you specified in the APP_URL and Traefik labels).
Ensure you have created a DNS A-Record or CNAME entry pointing bookstack.example.com to your Traefik load balancer IP address.
You will be greeted by the BookStack login screen. Use the default credentials to log in:
- Email:
admin@admin.com - Password:
password
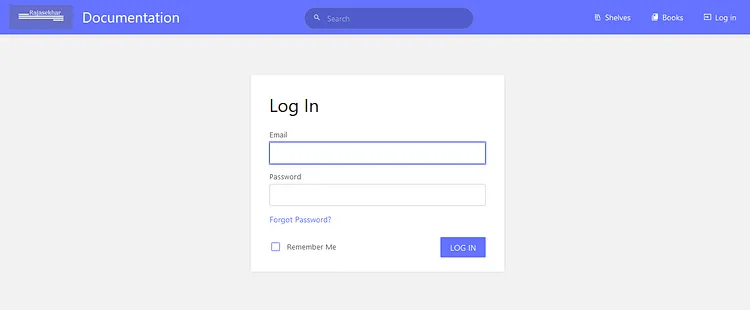
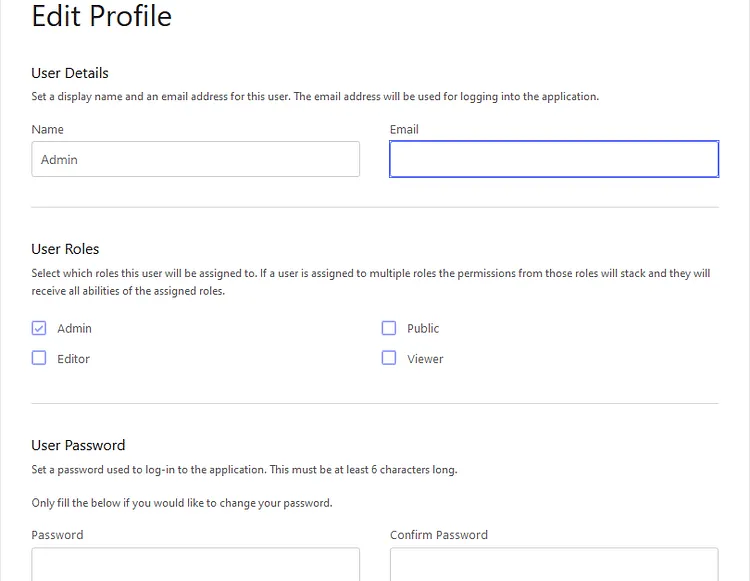
Make sure to immediately change the admin email address and password in the Edit Profile settings.
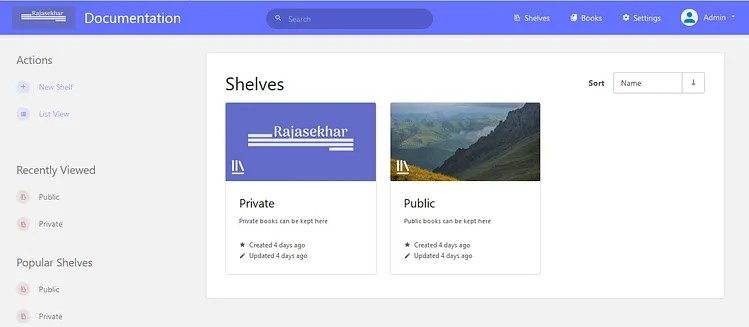
Here is a preview of the Shelves view:
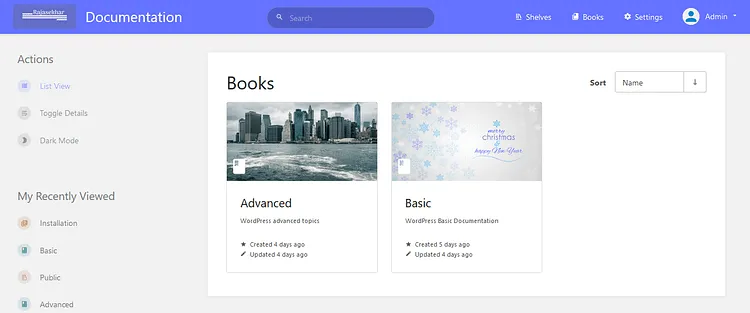
And the Books view:
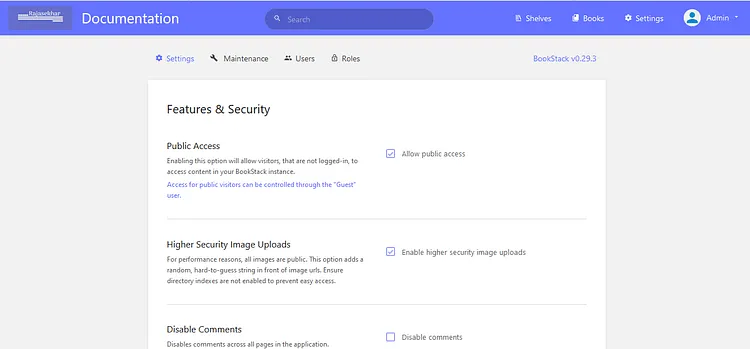
Finally, explore the Settings panel to customize your instance:
I hope you found this tutorial helpful! Please share your thoughts or ask any questions in the comments below. Your feedback helps me bring more open-source, self-hosted deployment guides to the blog.
Stay tuned for more deployments in upcoming posts!

Continue reading

How to Deploy Wiki.js 2.5.299 in Docker Swarm Behind Traefik v2.0
Wiki.js is a modern, lightweight, and incredibly powerful open-source wiki application built on Node.js. Learn how to deploy it in a Docker Swarm cluster.

How to Deploy Metabase 0.46.5 in Docker Swarm Behind Traefik v2.10.1
Metabase is the easy, open-source way for everyone in your company to ask questions and learn from data without knowing SQL. Learn how to deploy it in a Docker Swarm cluster.

How to Deploy Jekyll 4.2.0 in Docker Swarm Behind Traefik v2.0
Jekyll is a highly customizable static site generator. Transform plain text written in your favorite markup language into beautiful, static websites.